India's No1 #1 BIM 360 Training Institute in Bangalore with Placement
- 100 % Placement Guaranteed
- Offline and Online Course
- Experienced Lecture
- Smart Classrooms
- ISO certification
- Job oriented training with final project
- Unlimited interview opportunities
- Interview preparation
Apply for FREE Course Details
BIM Course Overview
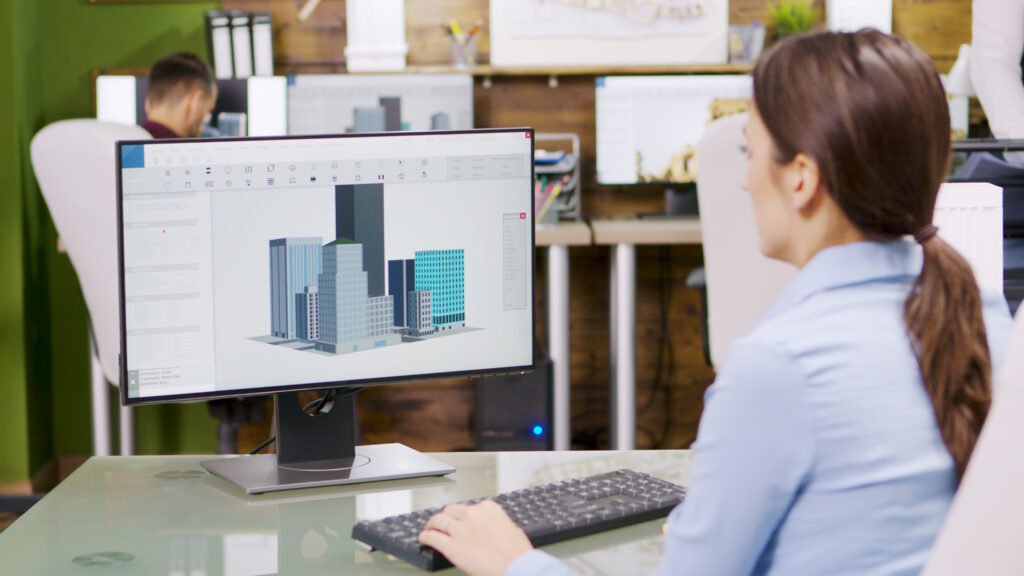
Building Information modelling is an intelligent 3D model-based process that gives Architectural, engineering, and construction (AEC) professionals the insight and tools to more efficiently plan, design, construct and manage buildings and infrastructure. A BIM project manager plays a crucial role in advising clients, internal and external stakeholders on benefits of BIM and in implementing and managing major BIM processes. This requires demonstration of complete knowledge of BIM process and the ability to create the project environment in which BIM can realise its full potential.
BIM Course Prerequisites
Professionals with experience in managing projects within built environment including quantity surveyors, project managers, building surveyors, asset managers, Facilities Manager, Architects and Engineers, Cost Engineers, BOM Manager, BIM coordinator and Construction Project Managers are most suited for this program.
BIM Course Objective
Professionals with experience in managing projects within built environment including quantity surveyors, project managers, building surveyors, asset managers, Facilities Manager, Architects and Engineers, Cost Engineers, BOM Manager, BIM coordinator and Construction Project Managers are most suited for this program.
BIM Course Key Content
- Bim introduction
- Bim: new tools and new processes
- Bim design tools and parametric modelling
- Lightweight modelling applications
- Interoperability
- The evolution from file-based
- Exchange to building
- Bim for owners and facility managers
- Barriers to implementing bim
- Risks and common myths Bim or architects and engineers
- Building object models and libraries
- Bim for contractors
- Quantity takeoff and cost estimating
- Bim for subcontractors and fabricators
- Adopting bim in a fabrication operation
- The future: building with bim
- Duration 6 months
BIM Course Details
Elevate your professional journey by mastering BIM technology, the cornerstone of modern construction and design practices.
What is the learning method / pedagogy?
All the fundamentals are taught from the point of view of their practical applications on filed. Actual drawings are shared with you to study and learn skills of taking-off quantity & preparing estimates and budgets. Basic concepts of project planning are made clear. Visualization and logical thinking skills are developed possibly through site visit. Assignments are given for study and confirmation of actual learning.
The learning steps
Learning Building Information Modeling (BIM) is a step-by-step process that progressively builds your understanding of the concepts, tools, and methodologies used in the construction, design, and management of buildings and infrastructure. the key steps for learning BIM, from basic knowledge to advanced application.
BIM Course Chapters
Module 1. Understand the Fundamentals of BIM
1. What is BIM?
BIM is a process that involves creating and managing digital representations of the physical and functional characteristics of a building or infrastructure. It goes beyond just 3D modelling, incorporating time (4D), cost (5D), and facilities management (6D).
2. BIM vs. CAD CAD
CAD (Computer-Aided Design): Primarily focuses on 2D drawings and basic 3D models without the integration of data. BIM: Involves rich, data-driven 3D models and integrates multidisciplinary information (architecture, structure, MEP) in a collaborative environment
3. BIM Benefits
Improved Collaboration: Shared, consistent models across stakeholders (architects, engineers, contractors). Better
Project Visualization: 3D models help stakeholders visualize designs before construction.
Reduced Errors: BIM’s comprehensive data reduces the likelihood of design and construction errors. Faster
Project Delivery: Efficient planning, sequencing, and collaboration result in quicker timelines.
Cost Efficiency: BIM helps in cost estimation, reducing waste, and avoiding delays.
4. BIM Workflow
Project Phases: Learn about the stages of a BIM project: Conceptual Design → Schematic Design → Design Development → Construction → Opera5on & Maintenance.
BIM Execution Plan (BEP): A document that outlines the project’s BIM goals, processes, and technology
Module 2. Learn the BIM Tools and Software, Key Tools to Master
Drafting Software – Autodesk Autocad – for more precise 2D drafting and detailed drawing tool with broad application. 3D
Modelling Software – Autodesk Revit Architectural Autodesk Revit Structural Autodesk Revit MEP
Coordinate Software Autodesk Navisworks- Learn how to use Navisworks for 3D model coordination, clash detection, and visualization.
Visualising Software Enscape-Most user-friendly, with real-time rendering directly within your 3D modelling software,
1. AutoCAD 2D
- Navigating the Working Environment
- Setting the Workspace
- Keyboard Inputs
- User Interface
- About the shortcut Menus
- More AutoCAD – Specific Interface Working with files
- Displaying Objects
2. Display Tools
- Pan
- Zoom Realtime
- Zoom Command option
- Wheel mouse Features
- Function Keys
- Regen
3. Creating Basic Drawings
- Inputting data
- About the command line
- About the Coordinate System
- Relative Coordinate system
- Relative polar coordinate system
- About Dynamic Input
- Creating Basic drawing
- Line Command
- Circle Command
- Arc Command
- Erase Command
- Undo and Redo command
- Oops Command
- Rectangle Command
- Polygon
- Ellipse Command
- Spline
- Points
- Xline
- Ray
- Using Object Snaps
- About Object Snaps
- Using Polar Tracking & Polar Snaps
- Using Object Snap Tracking
4. Working with Units
- About Units
- Setting Different types of units
5. Manipulating Objects
- Setting objects in the Drawing
- Using window selection
- Using lasso selection
- Using fence, CP,WP
- Selection with Grips
- Moving Object
- Rotating Object
- Creating New objects from the existing object (copy, mirror, array)
6. Trim Command
- Extend Command.
- Offsetting Objects
- Join Command
- Break Command
- Creating fillet
- Creating Chamfers
- Explode
- Erase
- Stretching Objects
- Scale
7. Drawing Organization and Inquiry Command
- Using Layers
- Organising Objects with Layer
- Changing the object Properties
- About object properties
- Changing the properties
- Quick Property
- Matching object properties
- Using the property palette
- Using line Type
- About line type
- Adding line types in drawings Inquiry Command
- About Measuring
- Obtaining Object Information
8. Working With Reusable Content Using Blocks
- About Block
- How Blocks Behave
- Creating Blocks
- Inserting Blocks
- Dynamic block
- Block Attributes
- Using tool Palette
- Add content to Tool Palette
- Working with Design Center
9. Annotating the Drawing
- Creating single line text
- About Single line text
- Creating Single line text MASTER CERTIFICATE IN BIM 7
- Creating Multiline text
- About Multiline text
- Creating multiline text
- Mtext column and Grips
- Editing Text
- Using Text Style
- Creating new text style
10. Dimensioning
- Creating Dimension
- Creating Dimension on objects
- Creating dimension on curved objects
- Enhancing Dimensions
- Using Dimension Style
- About Dimension Style
- Creating and modifying dimension Styles
- Using Multileaders
- About multileaders
- About multileader Styles
- Editing dimensions
- Editing Dimension styles and dimensions ➔
11. Hatching
- Hatching objects
- Introduction to hatch pattern and Gradients Fills
- Associative hatch pattern
- Using separate hatch
- Editing hatch pattern
- Editing hatches
12. Creating Additional Drawing Objects
- MASTER CERTIFICATE IN BIM 8
- Working with polylines
- About polylines
- Creating polylines
- Editing Polyline
- Creating Splines
- About Splines
- Creating and edit splines
- Creating Ellipse
- Using Tables
- About Tables
- Creating tables and entering table Data
- Attaching external reference file
- Revision cloud
- Wipeout & isolate object
- Express tool
13. Working with Layouts
- Using Layouts
- About Layouts
- Creating a New layouts
- Adding templates
- Using Viewports
- Creating rectangular Viewports
- Creating and manipulating viewports
14. Creating Drawing Templates
- About drawing templates
- Creating new templates
15. Isometric drawings
AutoCAD 3D
1. Introduction to 3D Modeling
- Introduction to 3D
- Creating solid primitives
- Mesh primitives
- Working in 3D
- Introduction to free form design
2. Modelling Workflow
- Creating models from 2D profiles
- Using Booleans on solid models Creating composite models
- Extracting geometry from solid models
- Getting information from 3D objects
3. Editing Models
- Adding detail to your solid models
- Editing solid models
- Manipulating the model
- Duplicating the model
- Converting 2D objects
- Basic mesh modelling
4. Sectioning a Model and Creating Drawings
- Section a solid model and generate 2D geometry
- Creating drawings from 3D model
4. REVIT ARCHITECTURE
Introduction
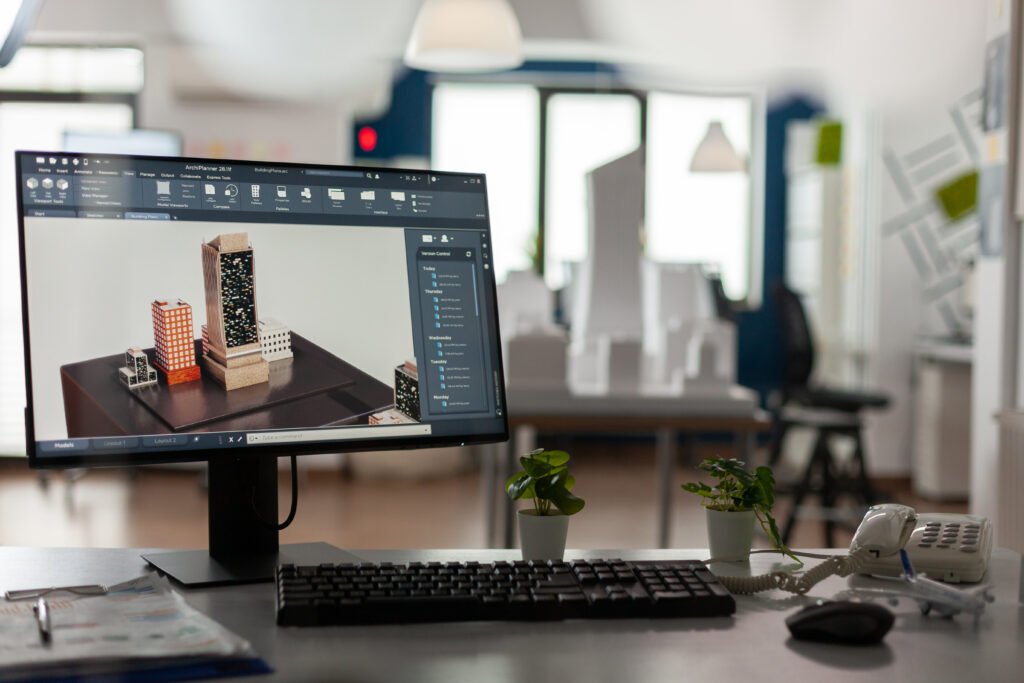
Building Information Modelling
Introduction to Revit
Architecture Projects,
Project Template,
Revit File Types
Exploring the GUI
Building Elements: Revit Elements and Families
Starting a Project
Levels
- Creating Levels
- Defining Levels
- Modifying Levels
- Projects
1. Unit Introduction to walls
- Creating walls
2. LevelsStarting a Design
- Temporary Dimensions
- Drawing Aids
- Adding and Modifying Walls
- Wall properties
- Inserting and modifying Layer
3. Edit wall joins
4. Modifying Tools
- Trim/extend, Offset, Align, Scale, Split, Move, Copy, Array, Rotate, Mirror
5. Floors
- Creating Floors
- Modifying Floors
- Floor Slab edge
- Porch floor
6. Doors
- Placing a Door
- Modifying Doors
7. Windows
- Placing a Window
- Modifying Window
8. Match property
Adding Components from Modern Medium Library
Modifying Components
Materials and Textures
Process of Using Material
Styles Editing a material
Texture Using Material styles
Openings
- Edit Profile
- Wall opening
Managing Views: Section and Elevation
1. About 3D Views
- Cut Profile
- Elevation Views
- Stacked wall
2. Roofs
- Creating Roofs
- Process of Sketching Roofs
- Modifying Roofs
- Join/Unjoin Roof
3. Opening
- Shaft opening
- Dormer opening
4. Vertical opening
5. Controlling Object Visibility
- Object Visibility Settings
- Visibility Graphics
- View template
6. View Properties
7. Section box.
8. Ceilings
- Creating Ceiling
- Modifying ceilings
Camera View : Camera Steering Wheel Working
1. About Top surface
- Creating Top surface
- Property line
- Graded Region
- Contour label
- Site Tools
- Site Component
- Loading and Editing Site Components
- Parking Components
2. Stairs
- Creating Stairs and Railings
- Modifying Stairs and Railings.
3. Ramp
- Creating Ramp
- Modifying Ramp
4. Curtain Walls
- Curtain systems
- Curtain Grids and Mullions
- Creating Curtain Wall
- Modifying Curtain Grids and Mullions
- Model Text
5. Constraints
- Applying and Removing Constraints
- Dimensions and Constraints
6. Working with Dimensions
- Temporary Dimensions MASTER CERTIFICATE IN BIM 15
- Permanent Dimensions
5. Text & Tags
- Creating Text and Tags
6. Detailing and Drafting Views
- Temporary Dimensions MASTER CERTIFICATE IN BIM 15
- Permanent Dimensions
5. Callout Views
- Creating Text and Tags
6. Construction Documentation
7. Schedules
- Creating Schedules
- Schedule Properties
- Exporting Schedules
- Modifying Schedules Fields
- Create a Door Schedules
8. Modify the Appearance of Schedules
9. Rooms
- Room Schedules
- Adding Room Tag
- Calculating Room Volume
- Modifying Room Area and Volume
- Material Takeoffs
10. Legends
11. Sheet Arrangement
- Creating Drawing Sheets
- Working with Drawing Sheet
- Previewing and Printing Sheet and Views
12. Title block : Creating and Updating Title blocks
- Presenting the Building Model
- Drawing Sheets: Working with Drawing Sheets
13. Sun and Shadow: Sun and Shadow Settings
- Host Sweep & Reveal
- Non-building Components and Decals
14. Renderings: Setting for Creating Renderings Walkthrough
- Create and Export a walkthrough
15. In-Place Families
- Setting Work Planes
- Creating and Using In-place Families
- Modifying In-place Families
- Extrusion, Revolve, Sweep, Sweep Blend, Blend
16. Component Families
- About Component Families
- About the Family Editor
- About Parametric Formulas
- Creating a Family : Column creation, Baluster post
- Adding Parameters
17. Door Template
- Door Creation
- Adding Parameters
18. Window Template
- Window Creation
- Adding Parameters
19. Designing in Phases
- About phases
- Creating Phases
- Design options Using Room Elements in Design Options
- Properties of Design Options
- Working with Design Option sets
- Editing a Design option.
16.Creating Realistic Presentations Massing
- Create mass Solid & Void
- Place mass
- Wall by face
- Floor by face
- Curtain system
- Roof by face
REVIT STRUCTURE
Linking Arch model in structural interface.
1. Structural Modelling
- Working with grids
- Columns and beam
- Foundation and slab MASTER CERTIFICATE IN BIM 18
- Beam system
- Trusses and braces
2. Placing Loads & Boundary Conditions
3. Structural Reinforcement
- Structural Reinforcement
- Structural Reinforcing Settings
- Adding Rebar
- Multi – Planar Rebar
- Viewing Rebar In 3D
- Modifying Rebar Placement
- Rebar Types
- Editing Plan And Section Profiles
- Reinforcing Walls, Floors And Slabs
- Area Reinforcement
- Path Reinforcement
- Modifying Area And Path Reinforcement
4. Construction Documents
- Setting Up Sheets
- Sheet And Title Block Properties
- Placing Views On sheets
- Editing Views On sheets
- Working Inside Views
- Adding Revisions
- Overview – Creating Sheets
- Printing Sheets
- Printing Options
4. Annotating Construction Documents
- MASTER CERTIFICATE IN BIM 19
- Using Dimensions
- Editing Dimensions
- Using Text
- Using Text Types
- Detail Lines and Symbols
- Creating Legends In A Project
5. Scheduling
- Structural schedules
- Graphical Column, Schedules
- Modifying Graphical Column Schedules
- Material Takeoff schedules
- Additional schedules
- Overview— Revit Schedules And Takeoffs
6. Detailing
- Setting Up Detail Views
- Connecting A Callout To A Drafting View
- Saving Drafting Views
- Details With Lines And Components
- Annotating Details
- Patterning
- Shared parameters
Detailing
1. INTRODUCTION TO REVIT MEP
- Overview of the Revit MEP
- Interface Opening a Revit MEP MASTER CERTIFICATE IN BIM 20
- Project Viewing Command
2. STARTING REVIT MEP PROJECTS
- Starting Revit projects
- Linking Revit models
- Copying and monitoring linked files Setting up levels
3. AUTODESK REVIT MEP SYSTEMS
- About Revit MEP systems
- Working with Components Creating systems – Overview
- Systems Graphics
- Connecting Components
Analysing systems
1. SPACES AND ZONES
- Creating spaces
- Creating zones
- Creating colour schemes
2. PERFORMANCE ANALYSIS
- Introduction to energy analysis
- Preparing energy analysis
- Analysing the heating and cooling loads
- Exporting for secondary analysis
3. HVAC SYSTEMS
- About HVAC systems
- Adding terminals and mechanical equipment
- Adding ductwork MASTER CERTIFICATE IN BIM 21
- Creating duct systems Automatic Ductwork layouts
4. HYDRONIC PIPING SYSTEMS
- About Hydronic piping systems
- Adding mechanical equipment
- Drawing piping
- Creating Hydronic systems Automatic piping layouts
- Analysing piping systems
- Fire protection systems
5. PLUMBING SYSTEMS
- About plumbing systems
- Adding plumbing fixtures
- Drawing piping for plumbing systems
- Working with plumbing systems
6. ELECTRICAL SYSTEMS
- About electrical systems
- Placing electrical components
- Creating electrical circuits
- Cable trays and conduit
7. CONSTRUCTION DOCUMENTS
- Setting up sheets
- Placing and modifying views on sheets
- Printing sheets
8. ANNOTATING CONSTRUCTION DOCUMENTS
- Working with dimensions
- Working with text MASTER CERTIFICATE IN BIM 22
- Adding detail lines and symbols
- Creating legends
8. TAGS AND SCHEDULES
- Adding tags
- Working with schedules
9. DETAILING IN REVIT MEP
- Setting up detail views Creating details
- Annotating details
NAVISWORKS
1. GETTING START WITH NAVISWORKS
- Workspace overview
- Opening and Appending files in Navisworks
- Saving, Merging, Refreshing files
2. 3D MODEL REVIEW
- Navigation
- Selection tree and selecting objects
- Hiding objects
- Selection and search sets
- Measuring and moving objects
3. CLASH DETECTION
- Clash detective overview
- Setting clash rules MASTER CERTIFICATE IN BIM 23
- Clash test and report
- Changes on model according to the clash report
- Switchback tool
4. TIMELINER
- Timeliner overview
- Creating tasks
- Gantt view
- Timeliner simulation
- Cost simulation
- Report
5. QUANTIFICATION
- Overview
- Catalog definition
- Model takeoff
6. ANIMATOR
- Overview
- Basic animation
- Cameras and camera viewpoints
- Section planes
- Scene playback
7. ENSCAPE
- Overview
- Catalog definition
- Model takeoff
6. ANIMATOR
- Create, Select, & Update a View
- Select Projection Type
- Lighting
- Materials MASTER CERTIFICATE IN BIM 24
- Link Views to Settings Presets
- Materials
- Manage Uploads
- V-Ray Scene Export (Beta)
- Active Document
- Create, Select, & Update a View
- Panorama & Cardboard
- Control and Input
- Web Standalone Export
- Link Views to Settings Presets
- Video in Enscape
- BIM Information Panel
- Asset Placement
- Manage Views
- Sun, Geolocation, and Time of Year
- Live Updates and Synchronize Views
- Standalone Executable Export
- Collaborative Annotations
- Sound Sources
- Render an Image
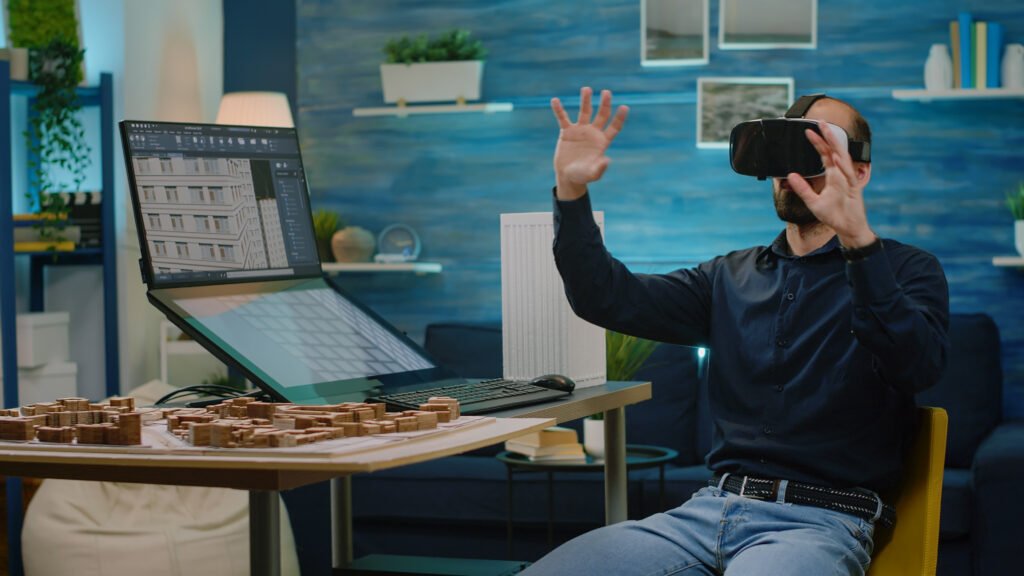
- Virtual Reality Headset
- Rendering Quality in Enscape
- Lighting
- Custom Asset Library
- Entourage and RPC Content in Revit
- Enscape Feature Highlights
- Settings Presets
- Rendering Styles
- Enable Enscape
Module 4. Learn About Level of Development (LOD) and Level of Information Need (LOIN)
- Project Phases in BIM: Understand the different phases of a BIM project
- Conceptual Design: Creating early massing and design concepts.
- Schematic Design: Developing a more detailed model that includes design elements and systems.
- Design Development: Creating more accurate and detailed models that include actual material specifications, system coordination, etc.
- Construction Documentation: Using the BIM model to generate construction documents, drawings, and specifications.
- Operation and Maintenance: Using BIM models for building operations, facility management, and asset tracking post-construction.
- BIM Execution Plan (BEP): Learn how to create a BEP, a document that outlines how BIM will be implemented and coordinated on a specific project
Module 5. Learn About BIM Standards and Guidelines
- LOD (Level of Development): Understand how LOD defines the level of detail and completeness of a model at different stages of the project.
- LOD 100: Conceptual design, basic shapes and sizes.
- LOD 200: Approximate geometry, with more defined forms.
- LOD 300: Detailed geometry with dimensions and material specifications.
- LOD 350: BIM Coordination
- LOIN (Level of Information Need): Learn how LOIN specifies the type and amount of information required by different stakeholders throughout a project.
Module 6. BIM Collaboration and Coordination
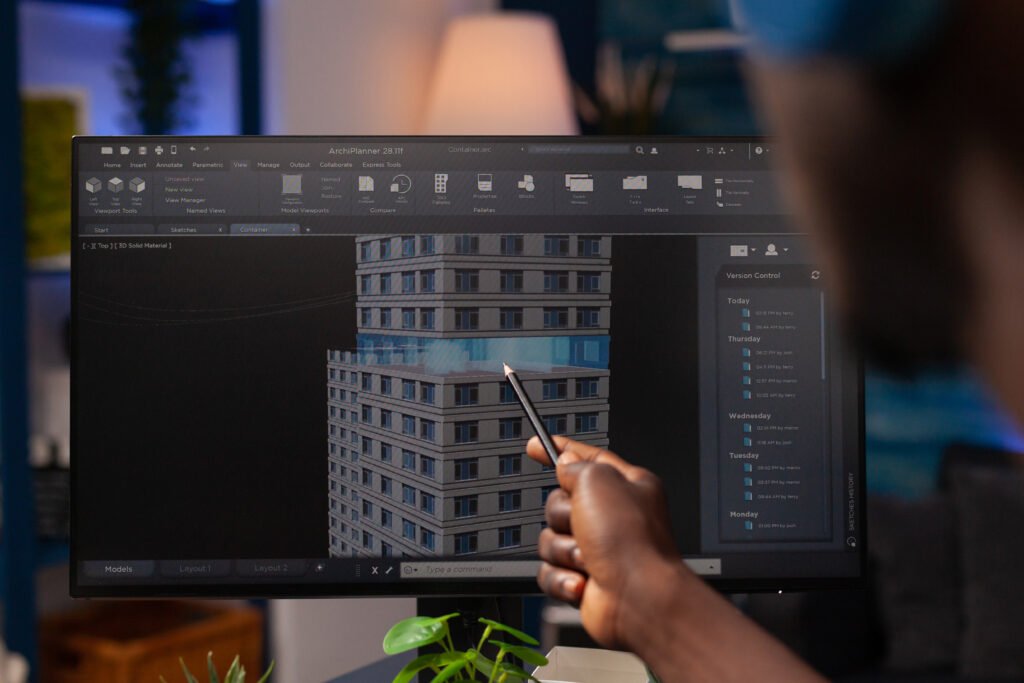
Learn how to use cloud-based tools like BIM 360 and Autodesk Construction cloud to share models, track changes, and collaborate in real-time with project teams. (Project Setup, Project Administration, Document Management, Model, Co-ordination, Issue Tracking, RFI (Request for Information) Management, Submittal Management, Collaboration and Communication, Mobile Access)
Module 6. BIM Collaboration and Coordination
BIM Collaborate Pro 1. Getting Started
- Sign Up/Login: Access BIM Collaborate Pro through your Autodesk account. MASTER CERTIFICATE IN BIM 27
- Dashboard Overview: Familiarize yourself with the dashboard layout, including project management, tasks, and collaboration tools.
2. Creating a Project
- Start a New Project: Click on “New Project” and enter the project details.
- Set Permissions: Define user roles and access levels for team members
3. Uploading Models
- Upload Files: Drag and drop your Revit, AutoCAD, or other compatible files into the project.
- Version Control: Keep track of file versions and changes made over time.
4. Collaboration Tools
- Commenting and Markups: Use the comment tools to provide feedback directly on models or documents.
- Real-time Collaboration: Work simultaneously with team members and see live updates
5. Task Management
- Create Tasks: Assign tasks related to specific issues or model elements.
- Track Progress: Monitor task status and updates to ensure deadlines are me
6. Issue Tracking
Log Issues: Record problems directly in the model with detailed descriptions and screenshots.
Assign Responsibility: Designate team members to address specific issues.
7. Document Management
- Upload and Share Documents: Manage project documentation, such as specifications and contracts. MASTER CERTIFICATE IN BIM 28
- Version Control: Ensure everyone is working from the latest document versions
8. Reviewing Models
- 3D Model Viewing: Use the built-in viewer to navigate and review models interactively.
- Clash Detection: Identify and resolve clashes between different disciplines.
9. Integrations
- Connect with Other Tools: Use integrations with Autodesk products or third-party applications for enhanced functionality.
10. Best Practices
Regular Updates: Keep all models and documents up to date.
Clear Communication: Use comments and tasks to maintain clear lines of communication within the team.
Industry Required Civil CADD Courses That You Need to Learn


India's #1 Civil BIM Training Institute in Bangalore Karnataka
Why Choose BIM Training in EduCADD Training Centre ?
100% JOB Guarantee
FEE Instalment
Experienced Lectures
Real Time Projects
One-to-One Training
Smart Classrooms
135+ Branches India
Online and Offline
What Our Student Say About EduCADD?
Get FREE COURSE & JOB Details
Get FREE Consultation BIM Course +91 99450 15018
Quick Links
Reach Us
- Phone Number : +91 99450 15018
- Mail : contact@educaddcentre.com
- Adress : 9th Main Rd, SBI Staff Colony, Hoshalli Extension, Stage 1, Vijayanagar, Bengaluru, Karnataka 560040
Copyright © Edu CADD Center Bangalore 2024 All rights Reserved